
In this article, you will discover how to create a request to add, modify or delete assets on your Serenety perimeters.SUMMARY
- Workflow
- Managing assets
- Modify one or more assets
- Delete one or more assets
- Send the request to CERT XMCO
Any user can initiate a request or modify an unvalidated request within their perimeter, but only a "manager" user can submit this request to CERT. Workflow

From the list of requests, you can manage all the assets in your perimeters:
- The first time a change (addition, modification, deletion) is made to a perimeter, a request is created and can be viewed in the list of requests (its status is "draft");
- Each time a new change is made (addition, modification, deletion), it is added to the draft request;
- If you make a change to another perimeter, this creates another request. Only 1 draft request per perimeter is possible.
- When you have made all your changes, you need to validate them on your draft request. You can check all the changes you have made and confirm that they have been sent to CERT XMCO. Your request then changes status to "Review by XMCO CERT in progress".
- Our CERT can then process your request: either validate or reject certain changes. When it has finished its review, your assets will be updated according to what has been validated, and you will have access to detailed feedback on your request (its new status will then be "Request Processed").
In the event of errors in the import of the requested changes, the status of the request will be "Request with errors".

Please note that it is possible to have the status "Request processed" even with errors (if at least one change has been made).
Summary of Status and Workflow

Managing assets
Add one or more assets
 Step 1 : Go to the page "My assets"
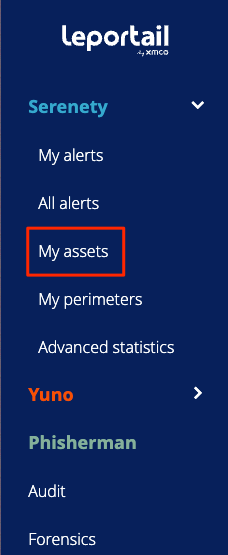
After logging on to the Portal, click on My Assets in the Serenety menu.
This takes you to the interface for managing your perimeters and assets.

 Step 2 : Click on Asset list
- You will arrive at a list of all your company's assets. This one is empty, because you need to select a perimeter.

- While on a perimeter, click on the Add assets + button.

 Step 3 : Choose how to add assets
- You can choose to import assets via a CSVfile or manually.

- The expected CSV format is available for download and follows the standard below.
- If the import is processed, a validation or refusal notification will appear to confirm processing.
- Here are some examples of notifications:
- a refusal :

- a validation :

- a refusal :
Modify one or more assets
Step 1 : Go to the page "My assets"

Once you have logged on to the Portal, click on List of requests on the Serenety menu.
This will take you to the interface for managing your perimeters and assets.

Step 2 : Click on Asset list
- You will arrive at a list of all your company's assets. This one is empty, because you need to select a perimeter.

- When you are on a perimeter, the list of associated assets will appear.
Step 3 : Choose how to modify one or more assets
- You can either edit asset information, using the "pen" icon

- Or you can switch one or more assets from active to passive scans (and vice versa), using the multi-selector and the Active Scans button.

Delete one or more assets
Step 1 : Go to the list of requests

Once you have logged on to the Portal, click on List of requests on the Serenety menu.
This will take you to the interface for managing your perimeters and assets.

Step 2 : Click on Asset list
- You will arrive at a list of all your company's assets. This one is empty, because you need to select a perimeter.
- When you are on a perimeter, the list of associated assets will appear.
Step 3 : Delete one or more assets
- Select one or more assets using the multi-selector, or simply click on the trash button next to an asset value.
- A pop-up will appear to confirm your deletion.
Confirm your deletion.

- A notification should appear to validate the addition of this asset deletion to your request.
To check the status of your request, click on My Request or on Request List.View your assets
Assets can be viewed in general via the list of requests.
However, to view the details of an asset (list of associated action tickets, list of associated perimeters, etc.), you need to go to the Assets tab in the Serenety menu.
- Once you have logged on to the Portal, click on List of requests on the Serenety menu.
- This will take you to the interface for managing your perimeters and assets.
- You will arrive at a list of all your company's assets. This one is empty, because you need to select a perimeter.
- When you are on a perimeter, you can view all the assets currently being monitored by the XMCO CERT.
- Each asset is defined by a value and a type (IP, Domain, Hostname, Keyword, URL, Email).
- Each asset can be scanned actively (=intrusive scan) or passively. This choice is displayed in the Active scans column.
- Keyword assets are associated with types (VIP, Project/Internal Domain, Product Name/Subsidiary/Brand, Service Provider, TenantID, Active Directory, etc.) to make them easier to filter/sort.
Send the request to CERT XMCO
Once your request for addition, modification and/or deletion has been finalised, we invite you to review it one last time before sending it to our CERT.
Step 1 : See the list of requests

- Once you have logged on to the Portal, click on List of requestson the Serenety menu.
- This will take you to the interface for managing your perimeters and assets.
- Click on Request List to access your request.

Step 2 : Browse and validate your request to send it to CERT
- Once you have finished reviewing your request, you can click on the Submit request button.
Congratulations, your request is now in the hands of CERT-XMCO! Once it has been processed, your request will change its status to "Processed" and you will be able to view the details directly in the Details of a request, as well as any changes to your perimeter.
Was this article helpful?
That’s Great!
Thank you for your feedback
Sorry! We couldn't be helpful
Thank you for your feedback
Feedback sent
We appreciate your effort and will try to fix the article